
If you’re planning to improve your smile with veneers or implants, you might wonder whether teeth whitening should come first or last.
The answer affects both how your smile looks and how long your results last. Making the wrong choice can leave you with mismatched colors that require expensive fixes later.
Teeth whitening before veneers or implants is important because dental restorations like porcelain and composite materials cannot be lightened with whitening treatments.
When you reverse this order, your natural teeth stay darker than your new restorations, or if you whiten later, your veneers and implants stay their original shade while surrounding teeth get lighter.
Neither option gives you the seamless smile you want.
Understanding the proper sequence for cosmetic dental treatments helps you avoid costly mistakes and ensures your investment pays off.
This guide explains why timing matters, what happens during each phase, and how to keep your new smile bright for years.
Key Takeaways
- Whitening must happen before veneers or implants because restorative materials cannot be bleached
- You need to wait at least two weeks after whitening for your tooth color to stabilize before placing restorations
- Proper treatment sequencing ensures your natural teeth and dental work match perfectly for a seamless smile
Table of Content
- Why Whitening Before Restorations Is Essential
- Understanding Restorative Materials and Whitening Limitations
- The Right Protocol: Steps for Whitening Before Veneers or Implants
- Maintaining a Radiant Smile After Treatment
- Common Scenarios and Specialty Cosmetic Planning
- Frequently Asked Questions
Why Whitening Before Restorations Is Essential
Getting professional teeth whitening before placing dental veneers or other restorations protects you from ending up with mismatched tooth colors.
Natural enamel responds to whitening treatments, but restorative materials stay the same shade forever.
How Whitening Affects Natural Teeth and Restorations
Your natural enamel contains tiny pores that allow whitening agents to penetrate and break down stain molecules. This process lightens your teeth by several shades over time.
Dental veneers, crowns, and other restorations work differently. These materials don’t have the same porous structure as your natural teeth.
Whitening gels cannot penetrate or change the color of porcelain, zirconia, or composite resin materials.
When you apply whitening products to your smile, only your natural teeth will brighten. Your restorations will keep their original color no matter how many whitening treatments you complete.
This creates an obvious problem if you whiten after your restorations are already in place.
Shade Matching and Avoiding Color Mismatches
Your dentist uses a shade guide to match your tooth shade during a smile makeover. This tool helps them select the exact color for your new restorations.
Whitening before veneers allows your dentist to match your restorations to your brightest, most stable tooth shade.
You reach your desired level of whiteness first, then your dentist creates veneers that blend perfectly with your newly brightened smile.
If you reverse this order, you face a tough choice later. You either live with darker natural teeth around your bright restorations, or you replace the restorations to match your newly whitened teeth.
Replacing veneers costs significantly more money and time than simply whitening first.
Preventing a Two-Tone Smile
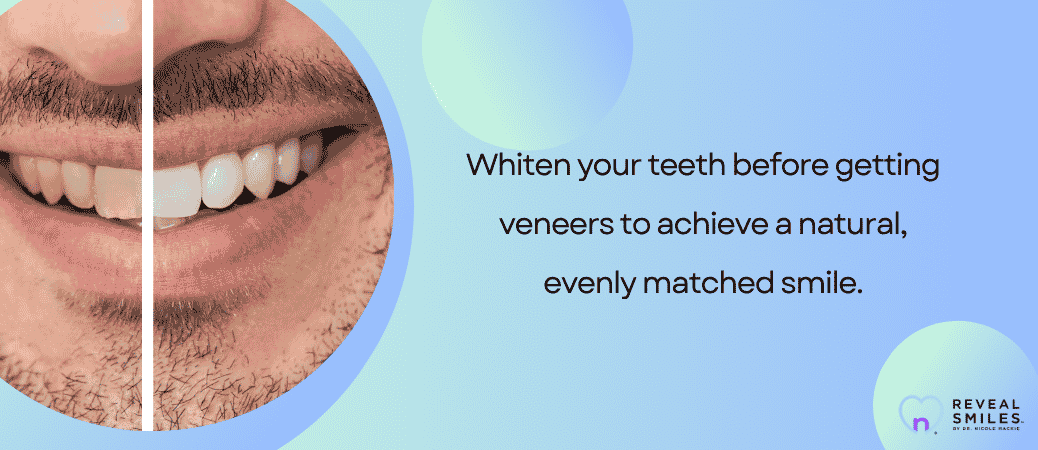
A two-tone smile happens when your natural teeth are noticeably lighter or darker than your restorations. This creates an uneven appearance that draws attention for the wrong reasons.
Whitening and veneers must be coordinated carefully during smile design to avoid this problem. Front teeth show the most when you smile, so any color difference becomes very obvious in photos and conversations.
You protect your investment by whitening first. Your natural teeth reach their final shade, settle for about two weeks, and then your dentist can create restorations that match perfectly. This approach gives you a cohesive, natural-looking result that stays consistent across your entire smile.
Understanding Restorative Materials and Whitening Limitations
Different dental materials react to whitening treatments in completely different ways.
Natural teeth can lighten with bleaching agents, but porcelain veneers and composite resin stay the same color no matter what you apply to them.
Porcelain vs. Composite Veneers and Crowns
Porcelain veneers are made from ceramic materials that are fired in a dental lab at very high temperatures. This process creates a dense, glass-like surface that resists staining extremely well.
The color is baked into the material permanently.
Composite veneers use a tooth-colored resin that your dentist shapes and hardens directly on your teeth. While composite resin costs less than porcelain, it’s slightly more porous.
This means composite veneers can pick up surface stains from coffee, tea, and red wine over time.
Both materials share one important trait: whitening agents cannot change their color. If you whiten your natural teeth after getting veneers or crowns, you’ll end up with mismatched shades.
Your natural teeth will look brighter while your restorations stay their original color. The only fix is expensive veneer replacement.
How Restorative Materials Respond to Whitening Agents
Whitening products use hydrogen peroxide or carbamide peroxide to break down stains in natural tooth enamel. These chemicals work through a process called oxidation.
Oxygen molecules penetrate your enamel and break apart the stain molecules trapped inside.
Restorative materials don’t respond to whitening the same way natural teeth do. Porcelain and composite resin are non-porous and chemically inert.
When you apply whitening gel to a crown or veneer, it just sits on the surface without penetrating or changing the color.
Your natural teeth have tiny tubules in the dentin layer that allow whitening agents to work from the inside out. Dental restorations don’t have this structure, so the bleaching chemicals can’t affect them at all.
Tooth Discoloration and Intrinsic Stains
Tooth discoloration comes in two main types: extrinsic and intrinsic. Extrinsic stains sit on the tooth surface from foods, drinks, and smoking. These respond well to whitening treatments.
Intrinsic stains develop inside the tooth structure. They can come from medications like tetracycline, dental trauma, or fluorosis from too much fluoride during tooth development.
Severe intrinsic staining may not respond well to standard bleaching.
If you have fluorosis or deep intrinsic stains, your dentist might recommend restorative dentistry options instead of whitening alone.
Veneers can cover stubborn discoloration that bleaching can’t fix. Your dentist will assess your specific type of tooth discoloration before recommending whether whitening or restorations make more sense for your smile goals.
The Right Protocol: Steps for Whitening Before Veneers or Implants
Following the correct whitening protocol ensures your veneers or implants match your brightest natural tooth shade.
The process involves choosing the right whitening method, evaluating your target shade, waiting for color stabilization, and ensuring proper bonding conditions.
Professional Vs. At-Home Whitening Methods
You have two main options for whitening: in-office whitening or at-home whitening kits. In-office whitening uses stronger bleaching agents and typically delivers faster results in one or two appointments.
Your dentist applies a high-concentration peroxide gel and may use a special light or laser to activate it. This method can lighten your teeth several shades in about an hour.
At-home whitening takes longer but costs less. You receive custom trays and professional-grade gel from your dentist. You wear these trays for a set time each day over two to three weeks.
For restorative treatments like crowns or veneers, most dentists recommend completing all whitening before any dental work begins.
The professional in-office method works well when you need predictable results quickly.
Shade Guide Evaluation and Digital Smile Design
Your dentist uses a shade guide to measure your current tooth color and determine your target shade. This small tool contains tooth-colored tabs arranged from lightest to darkest.
Digital smile design technology allows you to preview your final results before treatment starts.
Your dentist takes photos and creates a digital mockup showing how your whitened teeth and new veneers will look together.
This shade planning step is critical because veneers and bonding materials cannot be lightened once they’re made. Your dentist selects the veneer shade based on your whitened teeth, not your original color.
Some patients choose bleach shades like BL1 or BL2 for an exceptionally bright smile. Others prefer natural-looking shades that blend with their facial features.
The Waiting Period After Whitening
You must wait at least two weeks after whitening before getting veneers or implants placed. This waiting period after whitening serves two important purposes.
First, your teeth need time to rehydrate and settle into their final stable color. Right after whitening, your teeth may look artificially bright due to temporary dehydration.
Second, the bleaching gel releases oxygen molecules that stay trapped in your tooth structure for several days. These molecules must completely dissipate before any dental work.
Your dentist schedules your next appointment only after this mandatory stabilization window. Rushing this step leads to color mismatches and bonding problems.
Ensuring Bond Strength and Shade Stabilization
The shade stabilization period directly affects how well your veneers stay attached. Residual oxygen from whitening interferes with the chemical reaction of veneer cement.
When oxygen is present, the dental bonding materials cannot cure properly. This reduces bond strength and increases the risk of veneer failure.
The two-week waiting period allows complete oxygen dissipation from your enamel. Your dentist can then use light-cured or dual-cured resin cements that create strong, lasting bonds.
After stabilization, your teeth reach their true final shade. This ensures the dentist can match the color properly when fabricating your custom veneers or selecting implant crowns.
Maintaining a Radiant Smile After Treatment
Once you’ve invested in veneers or implants and completed your whitening treatment, the work doesn’t stop there.
Regular touch-ups, mindful habits, and the right oral care products will keep your smile looking bright and natural for years to come.
Touch-Up and Maintenance Whitening
Your natural teeth will gradually darken over time from food, drinks, and aging. This means you’ll need periodic touch-up whitening to keep them matching your veneers or the teeth surrounding your implants.
Most people need maintenance whitening every 6 to 12 months. The exact timing depends on your diet and habits.
Your dentist can provide custom take-home trays for convenient touch-ups. These trays let you apply professional-strength gel at home for a few nights when you notice your natural teeth starting to dull.
Common touch-up schedules:
- Light staining habits: Once per year
- Moderate coffee/tea consumption: Every 8-9 months
- Heavy staining habits: Every 4-6 months
Never attempt to whiten your veneers or implant crowns themselves. The whitening gel only works on natural enamel, and maintaining cosmetic dental work requires focusing on the teeth that can actually change color.
Preventing Stained Teeth Post-Treatment
Avoiding stained teeth means being smart about what touches them. Coffee, red wine, tea, and dark berries are the biggest culprits for discoloration.
You don’t need to give up these foods completely. Just rinse your mouth with water after consuming them or use a straw for dark beverages.
Tobacco use causes severe staining that’s difficult to remove. Quitting smoking or vaping will dramatically extend the life of your whitening results.
Foods and drinks that cause the most staining:
- Coffee and black tea
- Red wine and dark sodas
- Berries (blueberries, blackberries)
- Tomato sauce and curry
- Balsamic vinegar
Brushing within 30 minutes after eating helps prevent stains from setting into your enamel. If you can’t brush right away, chewing sugar-free gum stimulates saliva production, which naturally cleans your teeth.
Choosing Non-Abrasive Toothpaste and Professional Cleanings
Non-abrasive toothpaste protects both your natural teeth and your restorations.
Harsh whitening toothpastes can scratch veneers and create a dull surface that collects more stains.
Look for toothpaste with a Relative Dentin Abrasivity (RDA) score below 70. Your dentist can recommend specific brands that clean effectively without damage.
Professional dental cleanings every six months remove surface stains that regular brushing misses.
Proper post-treatment care includes these appointments to polish your teeth and check that your veneers or implants remain in good condition.
During cleanings, your hygienist uses special tools that won’t scratch or chip your restorations. They can also identify areas where staining is starting to develop and suggest adjustments to your home care routine.
Regular cleanings combined with gentle daily brushing keep your entire smile looking uniform and bright.
Common Scenarios and Specialty Cosmetic Planning
Different cosmetic treatments require specific planning sequences to avoid color mismatches.
Understanding how composite bonding, temporary restorations, and veneer replacements interact with whitening helps you make better decisions about timing.
Composite Bonding Versus Veneers
Composite bonding uses tooth-colored resin applied directly to your teeth in a single visit. This material cannot be whitened once it’s placed on your tooth.
If you’re considering composite bonding or veneers, you need to whiten first regardless of which option you choose.
The main difference is that composite bonding can stain over time from coffee, tea, and red wine. Porcelain veneers resist staining much better.
Dentists usually recommend whitening your teeth at least two weeks before any bonding procedure.
This waiting period lets your tooth color stabilize after bleaching. Your dentist can then match the composite resin to your new brighter shade.
Key differences:
- Composite bonding costs less but may need replacement every 5-7 years
- Porcelain veneers cost more but typically last 10-15 years with proper care
- Both materials are permanently colored and won’t respond to whitening gels
Temporary Veneers and Smile Makeovers

You’ll wear veneers between your tooth preparation appointment and when your permanent veneers are ready. These temporaries protect your prepared teeth for about 1-2 weeks.
Complete all whitening treatments before your smile makeover begins. Your dentist uses your stabilized tooth color to design both your temporary and permanent veneers.
Smile makeover planning requires knowing your final shade from the start.
Temporary veneers give you a preview of your new smile shape and size. However, they’re made from acrylic and won’t match the translucency of your final porcelain restorations.
Some patients worry their temporaries look too white or fake, but this doesn’t reflect how the permanent veneers will look.
Never try whitening while wearing temporary veneers. The whitening gel won’t affect the temporaries and could irritate your prepared teeth.
Replacing Veneers and Long-Term Results
Veneers typically last 10-15 years before needing replacement. Your natural teeth can yellow during this time while your veneers stay the same color.
If you want to replace old veneers and brighten your smile, whiten your natural teeth first. This creates a fresh baseline for matching your new veneers. Dentists recommend whitening before restorative treatments even when replacing existing work.
Some patients only have veneers on their front teeth. The teeth next to your veneers will gradually become darker over the years.
You can whiten these natural teeth periodically to maintain color harmony, but the veneers themselves won’t change. This is why choosing a slightly brighter shade initially often makes sense for long-term results.
Frequently Asked Questions
Whitening treatments work only on natural tooth enamel, while dental restorations like veneers and crowns keep their original color permanently.
Understanding this difference helps you plan treatments in the right order to avoid color mismatches.
Should I whiten my teeth before getting veneers or after?
You should whiten your teeth before getting veneers. This approach gives you the best color match and the most natural-looking results.
Veneers are made from porcelain or composite resin, which cannot be whitened after they’re placed. If you whiten your natural teeth first, your dentist can match the veneers to your newly brightened smile.
Whitening after veneers only lightens your natural teeth. This creates a noticeable color difference between your veneers and the rest of your teeth.
If I’m getting dental implants, is it better to whiten my teeth first?
Yes, you should whiten your teeth before getting dental implants. The crown that goes on top of the implant is made to match your existing tooth color.
Dentists are very careful to match the color of teeth properly when placing crowns, veneers, or implants. If you whiten first, they can create a crown that blends perfectly with your brightened natural teeth.
Implant crowns cannot be whitened later. Whitening your natural teeth after getting an implant crown will make the crown look darker than your other teeth.
Can veneers or crowns be whitened later if my natural teeth change color?
No, veneers and crowns cannot be whitened. Dental ceramics and composite resins do not respond to bleaching agents.
These materials are non-porous and completely resistant to the chemicals used in whitening treatments. The color is locked in when the restoration is made in the dental laboratory.
If your natural teeth stain over time and you whiten them, your veneers or crowns will stay their original shade. This creates a mismatched appearance that can only be fixed by replacing the restorations.
How long should I wait between a whitening treatment and placing veneers or crowns?
You should wait at least two weeks after whitening before getting veneers or crowns. This waiting period is called the color stabilization period.
Right after whitening, your teeth may appear extra bright due to temporary dehydration of the enamel.
Over the next two weeks, your teeth rehydrate and the shade settles into its true, permanent color.
The waiting period also allows residual oxygen from the bleaching gel to dissipate.
This oxygen can interfere with the adhesive bonding process if veneers or crowns are placed too soon.
Will whitening make my veneers or implant crowns look mismatched with the rest of my teeth?
Whitening will only affect your natural teeth, not your veneers or implant crowns. If you whiten after getting these restorations, they will look darker than your newly brightened natural teeth.
This is why completing whitening before veneer or crown placement is so important. Your dentist can then match the restorations to your desired shade.
If you already have restorations and want a brighter smile, you may need to replace them after whitening your natural teeth. This ensures all your teeth match in color.
What if I already have veneers or implant crowns—can I still whiten my natural teeth safely?
Yes, you can safely whiten your natural teeth even if you have veneers or implant crowns. The whitening treatment won’t damage your restorations.
However, veneers and composite bonding do not respond to whitening agents. Your natural teeth will become lighter while your restorations stay the same color.
This creates a color mismatch that becomes more noticeable the whiter your natural teeth get.
You’ll need to decide if you can accept the color difference or if you want to replace your restorations to match your newly whitened smile.